With Delivrd Networks, you can build inventory & fulfillment networks for your partners and invite those partners to participate in your activities within Delivrd, based on access that you grant them. Here's how it works in Delivrd:
Creating a Network Record
To record a new network in Delivrd, follow these steps:
- In the upper-right corner of any Delivrd page, click Networks (to the left of your username).
- In the upper-right corner of the My Networks page that opens, hover over Actions and choose Add Network.

3. On the Create Network page that opens, enter the name of your network and specify whether it is an internal network, e.g. your warehouse staff or sales team, or a public network, such as suppliers, customers, or third-party fulfillment companies.
4. When ready, click Submit.

5. Your newly created network records will appear in the My Networks list, with the following actions available:

- Invite: Send invitations to other users that you want to add to your network.
- Users: View information about the network members and any pending invitations.
- Edit: Change the name and type of your network (private or public).
- Delete: Remove the network record.
Inviting Network Members
To add new members to your network, click Invite under Actions and provide the following information:

- Email address of invited user: Enter the email address to which you are going to send the invitation.
- Inventory Locations: Select the inventory locations that the invited user can access.
- Assign Products: Select the products that the invited user can access.
- Assign Channels: Select the sales channels that the invited user can access.
- Limited Access: Select the corresponding checkbox if you do not want the invited user to create their own products, locations, and suppliers.
Important! Currently only the user sending the invitations can create/update products, suppliers, bins, sales channels, couriers, resources and inventory locations which are visible to all users of that network. If invited users create products, for example, only they will have access to those products.
When ready, click Send. In case of success, your invitation will appear on the Pending Invites tab. You can delete it any time. You can also add more users on the network's page by clicking Invite User and filling in the same form again.

The invited user will receive the invitation both per email and as a notification when they log in to Delivrd. They can either accept or decline the invitation.

After the user accepts the invitation, they will see an overview of their role in your network based on the settings that you specified when creating the network. In our example, the user can process sales orders and receive inventory for purchase orders that you have created.

The user can also click a link to view the products that they can access.

They can add their own products, receive inventory for purchase orders, and create sales orders with those products if they have permissions.


If the invited user is allowed to create inventory records, they will also see the products and locations to which they have access under the subheader with the network's name:


As for inventory transactions, here's an example of what the invited user will see. The user has access only to the Default location and has permission only to count items at this location:

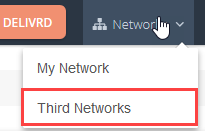
Finally, the invited user can view the networks where they are a member by hovering over Networks and choosing Third Networks.
On the Networks page that opens, the invited user can again see an overview of their role or leave the network.

From your side as a network owner, you can view the details of users who accepted your invitations under Details on the My Networks page.
Modifying the Network User Permissions
After you have added new users to your network, you can edit permissions that are assigned to them. Follow these steps:
- On the My Networks page, in the Actions column of the corresponding user record click Details.

2. On the page that opens, click Edit.

3. On the page that opens, the following settings are available:

- Sales Channels: Select the sales channels that the invited user can access.
- Products: Select the products that the invited user can access.
- Module: Select the Delivrd module for which you are setting the permissions - Inventory, Sales Orders, or Purchase Orders.
- View: Select this checkbox if the user can view the product and/or order records in the corresponding module.
- Update: Select this checkbox if the user can edit the product and/or order records in the corresponding module.
- Inventory Locations: Select the inventory locations that the invited user can access.
- Add: After you have chosen the module, view/update permissions, and location, click Add to save the permissions record in the table below. You can remove this record any time by clicking Remove under Actions.