An inventory location is a place where you physically store and manage inventory (receive, count, issue, sell, scrap, etc.). For larger operations, an inventory location can be a warehouse or a distribution center. For smaller operations, an inventory location can be a room or even a shelf.
By default, all registered Delivrd users are assigned to the Default inventory location, and all inventory transactions are assigned to this location. If you want to manage your inventory at multiple locations, you need to activate this feature in Delivrd.
Activating Multiple Inventory Locations
To activate multiple inventory locations, do the following:
- In the navigation bar on the left, click Settings.
- Select the Multiple inventory locations checkbox.
- Select the Create inventory record automatically during Transfer checkbox. This setting is required to successfully transfer the inventory between multiple locations and create automatic inventory records.
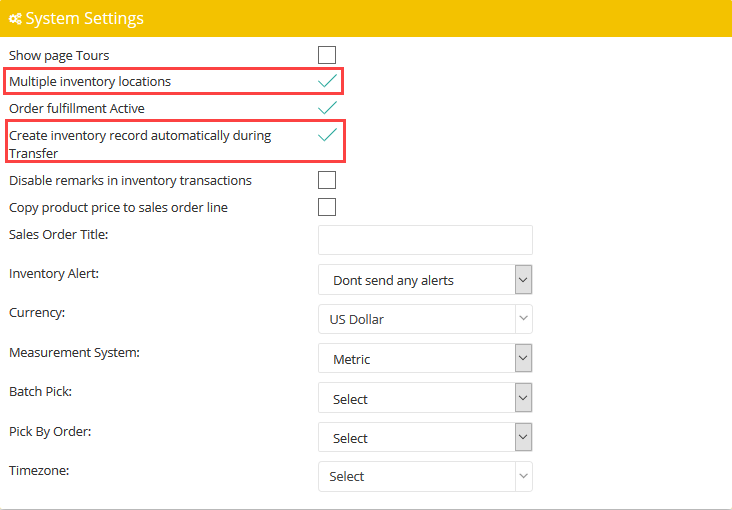
5. Click Save.
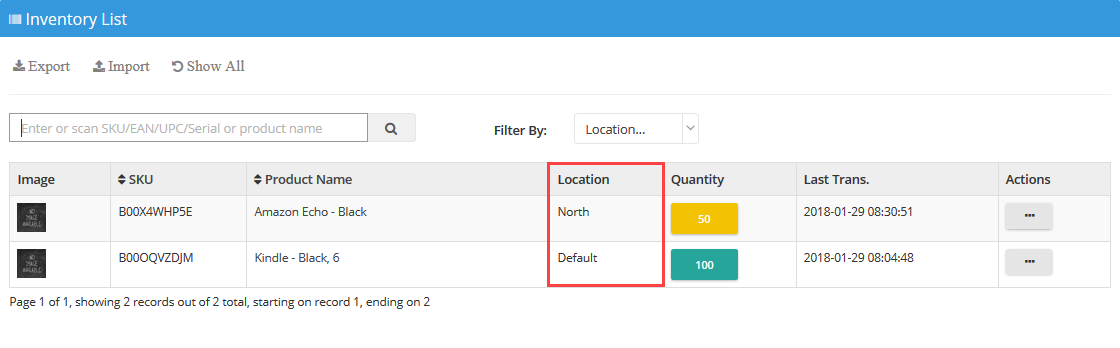
As a result, when you open the Inventory List page, you will see that each inventory record is now displayed with its relevant location.
In addition, after you activate multiple inventory locations, you will get access to the following options in the actions menu:

- Manage Locations: Go to the Locations page to create a new location record or managethe existing location records.
- Send Inventory Alerts: Immediately send the low inventory alerts to your suppliers.
- Print Inventory List: Print the inventory list.
- Inventory Transactions Report: Get an overview of all inventory transactions that you enter into Delivrd.
Creating Inventory Locations
An inventory location represents a physical location where stock of products is located. An inventory location can be a warehouse, a certain section withing a warehouse, or even an office, a plant or a construction site.
When you first sign up to Delivrd, the system automatically creates the Default inventory location, and all your inventory is managed through this location. You can change its name but you cannot delete it.
To create a new inventory location, do the following:
- In the navigation bar, click Products & Inventory > Inventory List.
- In the upper-right corner of the page, hover over the green button with three dots, and then select Manage Locations.
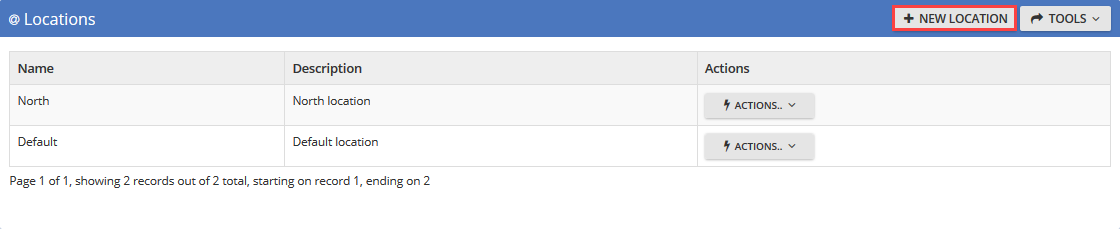
- A list of all existing inventory locations will appear. Here you can add, edit, or delete inventory locations.
- Click New Location.
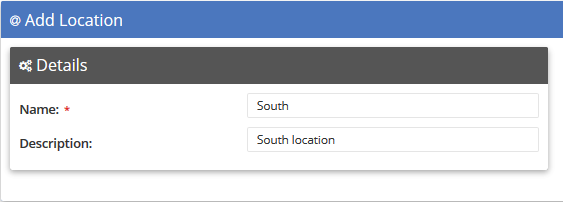
- On the Add Location page that opens, enter the name and description of anew location.
- Click Save.
Note: You cannot delete an inventory location that has products with inventory. You need to make sure that all products have 0 (zero) stock in an inventory location before deleting it.
Creating Inventory Records
An inventory record represents a combination of a product and specific inventory locations. A single product can exist in many inventory locations, and an inventory location can have as many products as you wish. To be able to manage a specific product in a specific inventory location, you should create an inventory record for this product in this specific inventory location.
To create an inventory transaction for a product in a specific location (for example, when receiving to inventory, counting inventory, or transferring inventory between locations), you should first create an inventory record. For example,if you want to transfer inventory for product A from the North location to the South location, you should first create an inventory record for both locations for this product. Otherwise, you will not be able to perform the transfer.
As you already know, it is possible to set up automatic creation of inventory records in Delivrd settings. However, if you did not select this option but still have some quantity of the product in a new location, you should create an inventory record manually.
To create a new inventory record, do the following:
- In the navigation bar, click Products & Inventory > Inventory List.
- Click Add Inventory Record.
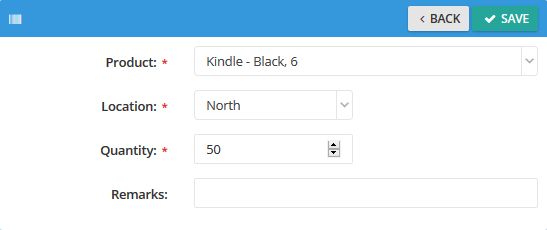
- Fill in the following information:
- Product: Select the product for which this inventory record is created.
- Location: Select the inventory location where this product is going to be stored and managed.
- Available Quantity: Enter the quantity of inventory for this product in the specified inventory location. If no inventory is stored for this product in the inventory location, you can still create the inventory record with zero (0) stock.
- Remarks: Enter any relevant comments.
Importing Inventory Data
If you manage many products across several inventory locations, maintaining inventory records can be time-consuming. In Delivrd, you can import your inventory data from a CSV file:
- In the navigation bar, click Products & Inventory > Inventory List.
- Click Actions > Import Inventory Data.
- On the page that opens, click Add File.
- Select the file that you are goingto import.
- Click either Start or Start Upload.
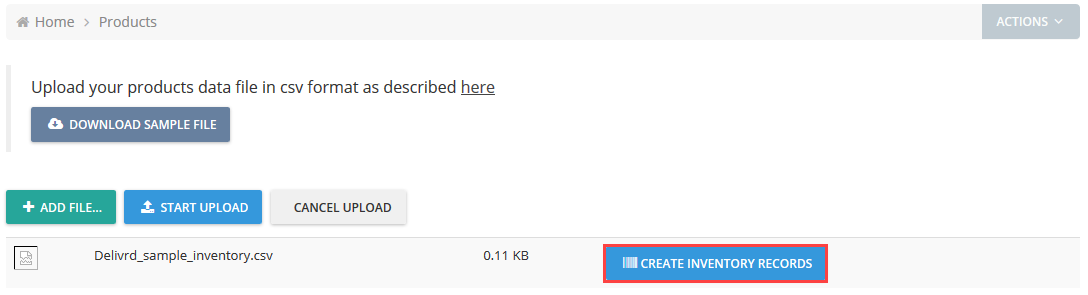
- After the file is uploaded, click Create Inventory Records.
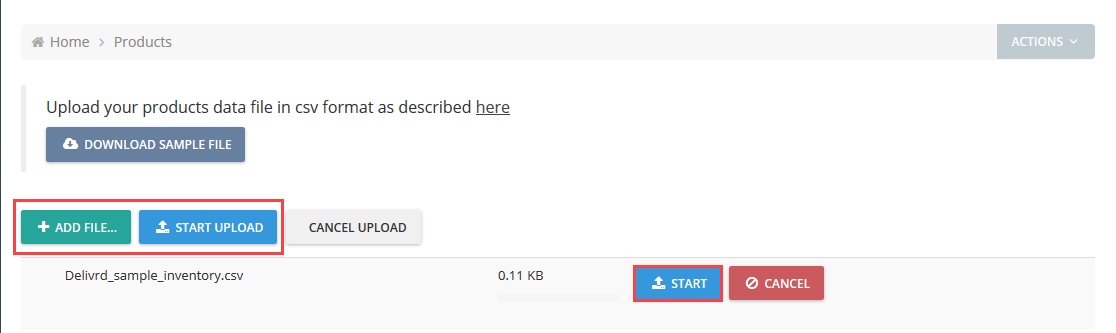
You can also download a sample file to see the structure of the inventory data file. This structure is quite simple: it contains a line number, product’s SKU, inventory location name, and inventory quantity. The file also contains a header line.
Counting Inventory at Multiple Locations
Inventory count is the most basic inventory transaction. When you are counting your inventory, you are entering the current quantity of available inventory at all locations. A healthy inventory management practice is to count inventory on a regular basis: daily, weekly, monthly, etc.
Inventory count is useful in the following situations:
- Initial entry to inventory: When you first start using Delivrd for your inventory management processes, you need to update Delivrd to reflect the actual, physical inventory that exists in your inventory locations.
- Inventory update: For many reasons, inventory quantity that is managed by Delivrd might not be the same as the actual quantities that you have on hand.
To count inventory, do the following:
- In the navigation bar, click Products & Inventory > Inventory List.
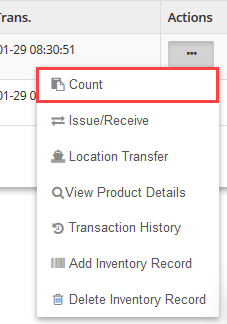
- In the inventory list, locate the required inventory record, and then click Actions > Count.
- Update the quantity that actually exists for this product at all locations.

Transferring Inventory Between Locations
This inventory transaction allows you to move a product inventory from the issuing location to the receiving location. To transfer the inventory between locations, do the following:
- In the navigation bar, click Products & Inventory > Inventory List.
- In the inventory list, locate the inventory record of the issuing location, and then click Actions > Location Transfer.
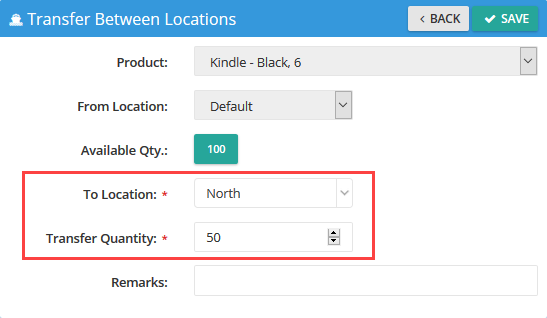
- On the Transfer Between Locations page, select the receiving location from the To Location list.
- In the Transfer Quantity field, enter the number of inventory items that you are going to transfer.
- Click Save.
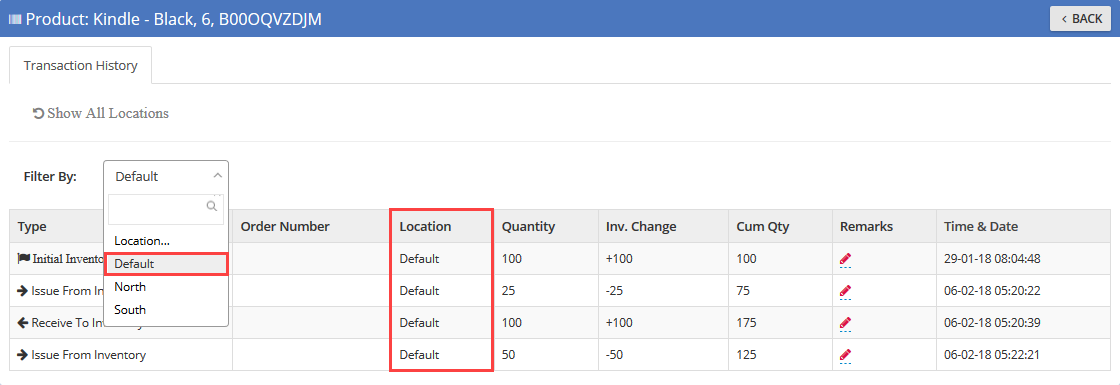
Transaction History
Transaction history displays each inventory transaction (goods receipt, shipment to customer, inventory count, return, etc.) together with its date, quantity, location, and impact on overall inventory.
To view the log of all transactions for a specific product, do the following:
- In the navigation bar, click Products & Inventory > Inventory List.
- In the inventory list, locate the required inventory record, and then click Actions > Transaction History.

The Transaction History tab displays the following data:
- Type: Types of inventory transactions, such as Initial Inventory Count, Inventory Count, Replenishment Order, or Sales Order. Each transaction type has a different impact on inventory quantities.
- Order Number: Relevant number of a replenishment order or sales order with a link to the order details. If the transaction is not related to an order, this column is blank.
- Location: Inventory location where the transaction was made.
- Inv. Change: Number by which the inventory is either reduced or increased, depending on the transaction type. In an Inventory Count transaction, the inventory change displays the difference between the quantity before the count and the quantity after the count.
- Cum Qty: Inventory quantity after the transaction is completed. It describes the actual quantity progress over time.
It is also possible to filter the transaction history by location and show all locations.