Setting Up Order Management in Delivrd
Before you start working with purchase orders, you should make sure this feature is active - it is a part of Delivrd Advanced plan (which is a paid plan).
- In the navigation bar on the left, click Settings.
- On the System Settings page, select the Order fulfillment active checkbox.

3. When ready, click Save.
Creating a Purchase Order Header
Like most types of orders, purchase orders consist of two parts: header and lines. To create a new purchase order header, do the following:
- In the navigation pane, click Inbound Processing > Purchase Orders.
- In the upper-right corner of the Purchase Orders List page, click Add Purchase Order.

3. Under Order Details, fill in the following information:

- Reference Order: Enter the number of the order that was provided by your supplier. Each supplier uses their own order number range and numbering logic. For example, Amazon order numbers look like: 106-1129021-9005857.
- Supplier: Select the supplier from which you are going to order the products or create a supplier record if the list is empty. The system will then automatically select the newly created supplier record.
- Shipping Costs: Enter the shipping costs that you will pay the supplier, if you know this information. Later these costs will be distributed between the different products of the order.
- Requested Date: Enter the date on which the customer expects the delivery.
- Order URL: Some suppliers might provide a URL to link directly to your order details, so you can update the URL here. When you view the order details in Delivrd, you will have a quick link back to your supplier’s website and details of your order.
- Remarks: Add comments, if applicable.
4. Click Save.
Creating Purchase Order Lines
Each purchase order should have at least one line (or item) consisting of a product ordered, its quantity, unit price, and comments, if any.
After you save the order header in Delivrd, the Add Order Line page opens automatically. On this page, fill in the following data:
- Product: Select the record of the product that is being ordered.
- Warehouse: If you manage your inventory at multiple locations, select the warehouse where you are going to receive the products.
- Qty: Specify the number of items that are being ordered.
- Unit Price: Specify the price per unit, as agreed with the supplier. This is the net unit price, and it does not include any discounts, delivery costs, or surcharges. The unit price in Delivrd is used primarily for profit/loss analysis.
- Remarks: Add comments, if applicable.
When you are ready, click either Save & Add Another to add more lines or Save & Close if you are not going to add any more lines. The order lines will appear below.

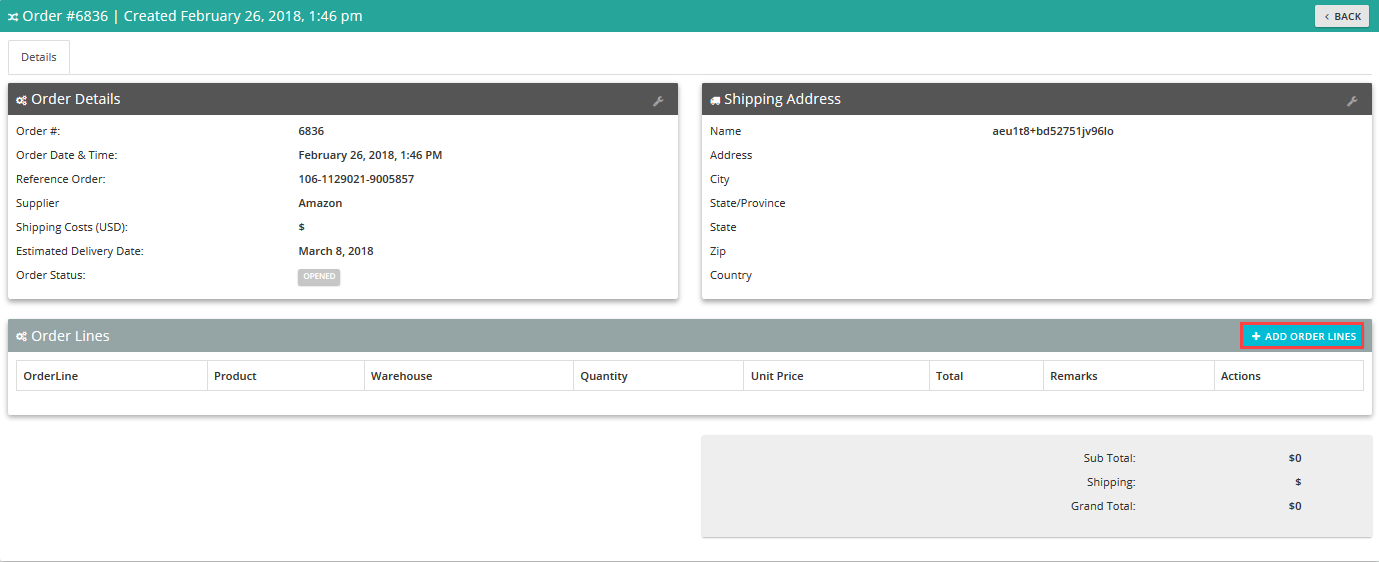
If you did not add order lines after the header was created, you can do it later:
- In the Purchase Orders List, locate your order. It should have the Opened status.
- Under Actions, choose Details.

3. On the order details page, click Add Order Lines.
Releasing the Purchase Order
When an order is initially created, it has the Opened status. It needs to be reviewed and released. After it is released, you can further process it - receive order products, create a shipment from the order, etc.
To release the purchase order right after you create the purchase order lines, click Release in the upper-right corner of the order details page.

In this case, the order status will instantly change from Opened to Released.

It is also possible to release the purchase order from the purchase orders list by clicking Release under Actions:

In this case, the system will suggest that you review the order before releasing it.

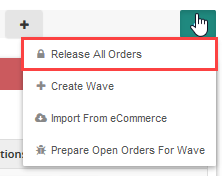
If you want to release several orders at once, just select the checkboxes next to those orders in the purchase orders list, hover over the ... button, and choose Release All Orders:
Receiving the Purchase Order Lines
Important! Delivrd currently does not support blanket purchase orders. That means that you cannot receive the same order line multiple times. If you receive an order line more than once, last quantity received will be overridden.
If you use blanket purchase orders with your suppliers, you will have to create a separate purchase order for each delivery your suppliers ships, or create a single purchase order with several lines, receiving each delivery against a seperate line.
The next step is to receive the purchase order lines:
- Under Actions, click Receive.
- On the Receive Purchase Order Products page, you can do either of the following:
- Receive individual lines by clicking Receive under Actions for each order line.
- Receive all lines by hovering over the ... button and choosing Receive All Products.
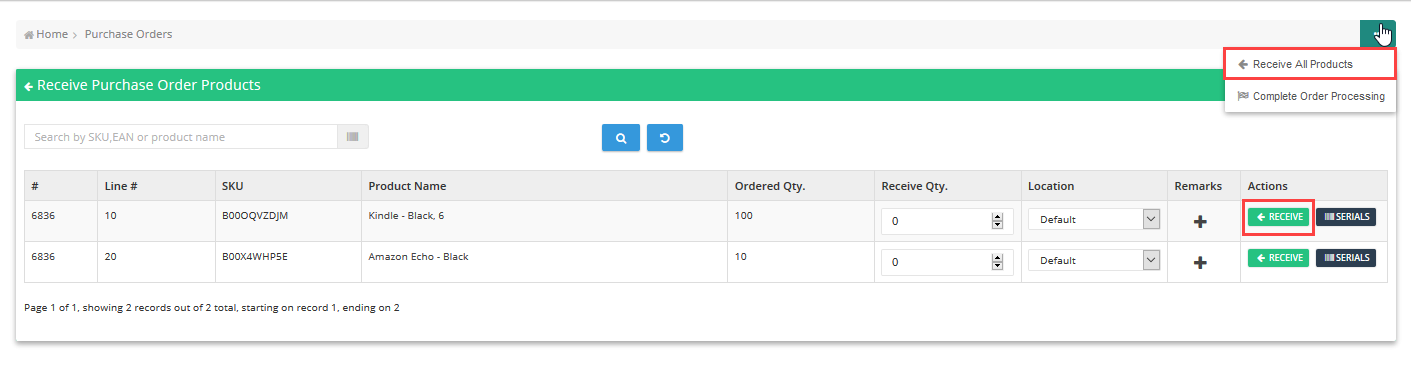
3. As a result, the order status will change to Completed and inventory quantity of the received product is increased by the quantity received.

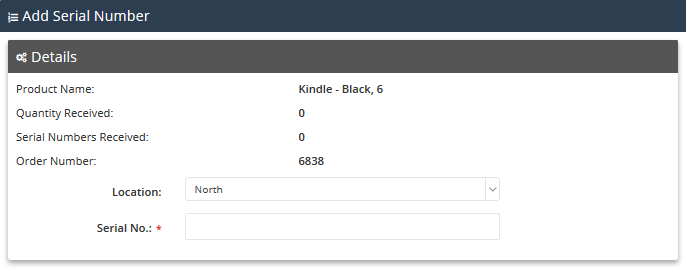
Receiving Serial Numbers
If your suppliers label their products with a barcode containing a unique serial number, you can scan the serial number barcode of each item that you get. To do it, click Serials when receiving your products:

On the Add Serial Number page that opens, you can see the received quantity, the number of serials that have been already scanned, and the order number. The cursor is placed automatically in the Serial Number field, so you can continually scan all barcodes of serials that you have received in the current shipment.